How to Repair Water Damaged Photos
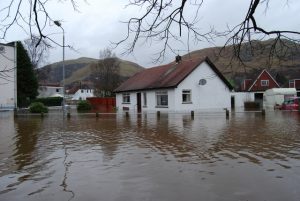
We hope you never have to deal with the problem of having to repair water damaged photos , as it unfortunately means you will also probably have had to deal with burst pipes or flooding from extreme weather conditions.
When the external and internal damage is repaired, and the clean-up operation begins, most people won’t mourn the TV, the fridge, or the couch (though they may well curse their misfortune, the inconvenience, and the expense) – these kinds of possessions can be replaced (and hopefully paid for by your insurance company).
Instead, the loss of precious family photographs and albums, is what cuts the deepest, and has a more lasting effect. But while it may seem hopeless when you look at piles of soaking wet, mud-spattered photos, don’t despair. Saving them (or at least some of them) may be possible by following a few simple steps. First you salvage them, choose the most precious (initially), then at Caledonian Digital we can repair water damaged photos.
Time is of the essence so it’s important to prioritise.
• Try to deal with your photos within a couple of days or they could begin to mould or stick together, making it much more unlikely they can be saved.
• Don’t “waste” time on photos that you already have a backup for – if you have a digital copy saved (somewhere safe) just reprint it, or if it’s the same photo that another family member of friend has, then get a copy of theirs.
• Begin with photographs for which there are no negatives, or for which the negatives are also water damaged. (If you want or need help to scan negatives or to scan slides please get in touch with us at Caledonian Digital)
• If they were prints from images on a computer or smart phone, and you stored backups in the Cloud, then focus on other photos first.
• If you already spent time and money scanning your complete photo collection then turn your attention to something completely different in trying to get back to normal, or just focus (to begin with) on a few favourites.
Remember, your photos are at their most vulnerable in this condition.
• Don’t rub surfaces together.
• Don’t run water straight from the tap onto the surface of the photo.
• Don’t use anything abrasive to remove dirt.
• Don’t try to dry them too quickly or they could curl and crack.
• Don’t rush when photos are stuck together. It can sometimes take over 30 minutes for soaking to allow them to separate.
The steps below are only a guide to how to try to save your photos. There is no guarantee that they will work in your situation, or that you will not lose at least some of your photos along the way, so although we advise that you save your most precious photos first, it would be best to practice your technique on a few less precious photos first!
How to Save Your Water Damaged Photos
Most photographs from camera film, negatives and slides should be able to be cleaned to some extent using the following steps, courtesy of Fujifilm.
1. If a photo print is completely or mostly dry, first lightly remove any mud on the surface using a soft brush. If you do not have a brush or if the photo print is only partially dry (or wet), proceed directly to Step 2. Be sure to wear thin rubber gloves (like medical gloves or gloves used for handling food).
2. Pass the photo print through room temperature water (approximately 20-30°C, 68-86°F) to remove large pieces of dirt. Do not forcibly scratch the photo as the surface can become damaged.
3. Next, soak the photo print in clean, room temperature water.
4. While submerged, gently use the tip of your finger or a soft brush to wipe the surface of the print to delicately remove any mud or sand. Be sure to start at the outside corners and move toward the centre, where the subject of the photo is located, as you clean while watching how the condition changes. Do not forget to wipe dirt off the back of the print. (A painting brush can remove dirt more efficiently than your finger when cleaning the back.)
5. If part of the image surface of the print easily turns red, yellow or white during these procedures, this indicates that the image is significantly damaged and should not be touched further. When the image surface is seriously damaged, it feels slippery to touch even when wearing thin rubber gloves. Such print image surfaces should only be lightly rinsed in water.
6. Once cleaning is finished, rinse in clean cool water and leave to dry in the shade or in a dark place where dust will not settle on the photo. It is fine to spread photos out on newspaper, etc. or hang them to dry using clothes pins. Rapid drying using hair dryers, etc. is not recommended as it may cause the photo print to curl up.
Extra Tip for Handling Water Damaged Photographs
7. Pictures in frames need to be saved when they are still soaking wet, otherwise the photo surface will stick to the glass as it dries and you will not be able to separate them without damaging the photo emulsion. To remove a wet photo from a picture frame, keep the glass and photo together. Holding both, rinse with clear flowing water, using the water stream to gently separate the photo from the glass. (If it won’t budge don’t force it. Let it dry and get it scanned. If you don’t have access to a scanner of your own, we can scan photos through the glass of a photo frame, so get in touch.)
For photo prints or album pages stuck together
Follow the steps below without forcibly trying to peel them apart.
1. First remove any dirt, mud or sand on the surface using a soft bush. If you do not have a brush or if the photo prints are wet, proceed to Step 2. Be sure to wear thin rubber gloves. We recommend the use of medical gloves or gloves used for handling food.
2. Next, soak the lightly cleaned photo prints or album in clean room temperature (20-30°C, 68-86°F) water.
3. Take care not to damage the photo image on the surface, and slowly and gently peel away the overlapping photo prints in order, from top to bottom. In the case of an album, the surfaces of photo prints may be facing each other, so the album backing paper, etc. should be slowly and gently peeled away after being sufficiently soaked in water.
4. It is important to let water gradually seep into the spaces between parts stuck together, and take your time peeling them away. Be prepared to sacrifice the album to save the prints inside. If it does not peel away, do not forcibly try to do so. Soak for a little longer in water and wait for the edges to naturally peel apart slowly. Please be patient as this may take from 30 minutes to an hour if the pages are stuck together badly.
5. Once you have peeled away the photo prints, rinse in clean, cool water and leave to dry in the shade or in a dark place where dust will not settle on the photos. It is fine to spread photos out on newspaper, etc. or hang them to dry using clothes pins. Rapid drying using hair dryers, etc. is not recommended as it may cause the photo print to curl up.
For entire albums of photo prints damaged
1. Pocket albums and albums with adhesive plastic sheets do not have a path for water to escape, so photo prints may remain wet for a long period of time. In such cases, the image surface of the photo print may be red, yellow or whiter due to damage. In particular, if the image appears as though colours have dissolved, the image may be washed away simply by immersion in water. We recommend that you sponge dirt off the plastic sheet and take a photo of the image with a digital camera or scan it before cleaning.
(For other types of albums, you may need to perform cleaning after drying the album first.)
2. First remove any dirt, mud or sand using a soft brush.
3. Next, soak the lightly cleaned album in clean room temperature (20-30°C, 68-86°F) water. Be sure to wear thin rubber gloves.
To make cleaning easier, it may be convenient to cut or disassemble album pages before soaking them in water. If you would like to keep the album in its original form, you will need a container large enough to soak the whole album.
4. Take care not to damage the photo image on the surface, and slowly and gently peel each photo away from the plastic cover or album backing paper. Lightly rinse the photo prints you have removed in water.
If the photo prints are not dry, you should be able to remove any attached dirt simply by rinsing. In images with particularly serious damage, part of the image may be lost simply by peeling away the plastic layer. In such cases, only remove the print and do not touch the image surface more than necessary or rinse too forcefully.
5. Once you have peeled away the photo prints, rinse in clean, cool water and leave to dry in the shade or in a dark place where dust will not settle on the photos. It is fine to spread photos out on newspaper, etc. or hang them to dry using clothes pins. Rapid drying using hair dryers, etc. is not recommended as it may cause the photo print to curl up.
Modern photos printed from Digital images
Photos that you printed at home will probably use dye that penetrates into the paper surface and preserve the surface characteristics of the paper. These shouldn’t be soaked for too long or you might wash away the ink, and lose the image completely (not just the colour!)
1. If prints are dry and separate, use a soft brush to clean the surface.
2. There is no need to soak them in water if there is not much dirt.
3. If there is a lot of dirt, soak them quickly in room temperature water, and work quickly.
4. If they are stuck together, they should peel away after being soaked for about a minute, so be sure to quickly remove them from the water.
5. If you leave them to soak too long or forcefully scratch the image surface, the dye ink (colour) will come away, and the colour tends to fade or become blurred.
6. If soaked in water, dry in the shade. The conditions may vary depending on the type of dye ink.
It can be very time consuming and costly (depending on how many photos you have) but it could save a lot of heartache if you have a digital archive in place should disaster strike. And cost is all relative when you’re talking about your complete family history. How much more would it cost if you have to get the whole collection repaired and restored if your home and your photos fall victim to extreme weather this winter? If you need help scanning a photo collection then please get in touch with us at Caledonian Digital.
We hope you never have to follow any of the steps above, but you should be as prepared for the worst as you can afford to be. Check out how to reduce the cost of photo restoration by following the hints and tips for looking after and storing your photographs in our earlier post on Bulk Photo Restoration – 8 tips to avoid the expense.